discovering how to apply makeup was totally a game-changer in my beauty routine. I vaguely recall my 16-year-old self, struggling with a drugstore foundation that was all wrong. But mastering the art of makeup transformed my entire relationship with beauty.
Makeup application isn’t an exclusive art form reserved for beauty gurus and Instagram influencers. Makeup is a skill that’s within reach for anyone with the proper techniques, tools, and a bit of patience. Even as a beginner it doesnt matter you can still excel. I’m here to guide you through the world of makeup in 2025.
Why Proper Makeup Application Matters
Before we dive into the how-to, let’s talk about why learning proper makeup application techniques is worth your time. It’s not just about looking good (though that’s a perk). When you know how to apply makeup correctly, you:
- Save time and money which avoids wastsage of product
- Boost your confidence with looks that enhance your natural features
- Protect your skin by using proper techniques that don’t cause irritation
- Create versatile looks that work for different occasions and settings
- dont be one of those people who give up because they cannot learn
Essential Tools for Makeup Application
Let’s start with the basics. You don’t need a professional kit worth hundreds of dollars, but having the right tools makes all the difference in how your makeup looks and feels.
Must-Have Brushes and Tools
Foundation brush or beauty sponge – This is your base game-changer. A damp beauty sponge provides an airbrushed finish, while a flat foundation brush offers more precise coverage control.
Concealer brush – Small, precise, and perfect for spot concealing without disturbing your foundation.
Powder brush – Large and fluffy for setting your base makeup without looking cakey.
Blush brush – Medium-sized with soft, natural-looking bristles for effortless application of color.
Eyeshadow brushes – You need at least three: a flat shader, a blending brush, and a small detail brush.
Eyeliner brush – For precise application and creating different eyeliner styles.
Mascara wand – Obviously for your lashes, but also great for separating them.
Lip brush – For precise lip color application and making your lipstick last longer.
I learned this the hard way, but investing in decent brushes upfront saves you frustration later. You don’t need luxury brands, but avoid the scratchy brushes that come free with makeup palettes.
Step-by-Step Makeup Application Process
1. Prep Your Canvas
Start with clean skin -Cleanse, moisturize, and let your skincare absorb for a few minutes.
Apply primer – Think of primer as the foundation for your foundation. It creates a smooth base, helps your makeup last longer, and can address specific skin concerns, such as pores or redness.
2. Create Your Base
The foundation application is where most people typically make mistakes. Here’s my foolproof method:
- Choose the right shade by testing on your jawline, not your hand
- Apply in thin layers – you can always build up coverage
- Work from the center of your face outward using gentle pressing motions
- Blend thoroughly at the edges to avoid harsh lines
For applying foundation, I prefer using a damp beauty sponge. It provides a seamless, skin-like finish that appears natural in any lighting.
Concealer comes next, not before foundation, like many tutorials suggest. Apply it only where needed: under the eyes, on blemishes, and around the nose if you have redness.
3. Set Your Base
Setting powder keeps everything in place. Use a fluffy brush to lightly dust translucent powder over your T-zone and any areas where you tend to get oily. Don’t powder your entire face unless you want a matte finish.
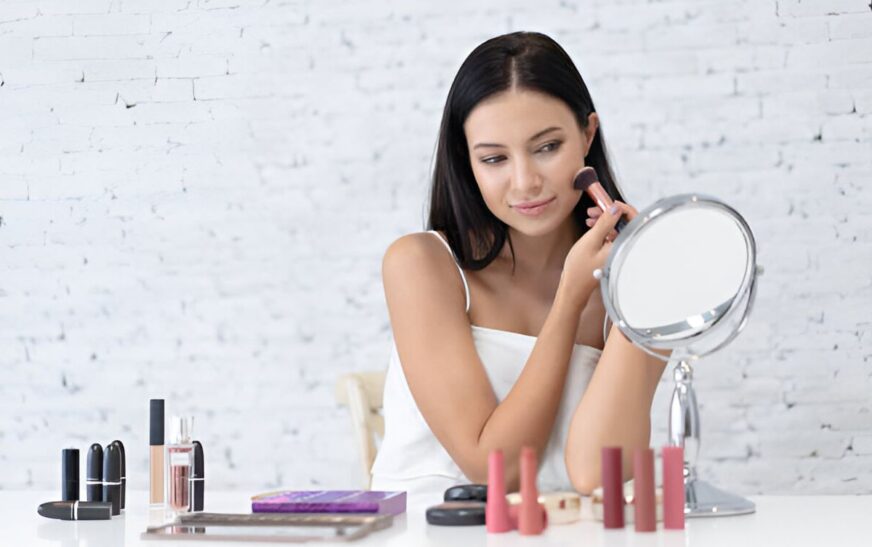
4. Add Dimension with Color
Blush application brings life back to your face after foundation. Smile and apply blush to the apples of your cheeks, blending upward toward your temples. The key is building color gradually – you can always add more.
Contouring and highlighting are optional but can enhance your features. Keep it subtle for everyday wear. Contour under your cheekbones, along your jawline, and on the sides of your nose if desired. Highlight the high points: cheekbones, nose bridge, and cupid’s bow.
5. Eye Makeup Techniques
Eyeshadow application follows a simple rule: light to dark, inner to outer.
- Start with a neutral base shade across your entire lid
- Apply your primary color to the mobile lid
- Use a darker shade in the outer corner and crease for depth
- Blend everything with a clean blending brush
Eyeliner techniques vary based on your eye shape and desired look. For beginners, I recommend starting with a brown pencil liner close to the lash line. It’s more forgiving than black and easier to blend if you make mistakes.
Mascara application may seem simple, but there’s a technique behind it. Wiggle the wand at the base of your lashes, then pull through to the tips. This creates volume and length without clumps.
6. Perfect Your Lips
Lip makeup can be as simple or complex as you want. For everyday wear, a tinted lip balm works perfectly. For more polished looks, use a lip liner to define your lips, then fill in with lipstick or gloss.
Common Makeup Application Mistakes to Avoid
I’ve made every mistake in the book, so learn from my failures:
Incorrect foundation shade – Test in natural light and allow it time to oxidize on your skin before making a decision.
Applying makeup in poor lighting – Natural light is your best friend. Avoid fluorescent bathroom lighting at all costs.
Skipping primer – It does make a difference in how your makeup looks and lasts.
Heavy-handed application – Build coverage gradually. It’s easier to add more than to take away excess.
Ignoring your eye shape – Not all eyeshadow techniques work for every eye shape. Learn what works for yours.
Forgetting to blend – Harsh lines are the enemy of good makeup. Blend everything thoroughly.
Makeup Application for Different Occasions
Every day, Natural Look
For daily wear, focus on enhancing rather than transforming. Use:
- Light foundation or tinted moisturizer
- Concealer only where needed
- Neutral eyeshadow
- Brown mascara
- Subtle blush
- Lip balm or nude lipstick
Professional/Work Makeup
Office-appropriate makeup should be polished but not distracting:
- Medium coverage foundation
- Well-defined but not dramatic eyes
- Neutral or muted colors
- Professional lip colors like berries or muted pinks
Evening/Special Events
This is when you can be more dramatic:
- Fuller coverage foundation
- Bold eyeshadow or winged eyeliner
- False lashes if desired
- Contouring and highlighting
- Statement lip colors
Case Study: Transforming My Makeup Routine
Let me share how learning proper makeup application changed everything for me.
A few years ago, I was that person who took 45 minutes to do my makeup and still felt like something was off. My foundation looked cakey, my eyeshadow was muddy, and my lipstick never lasted more than an hour.
The breakthrough came when I realized I was making three major mistakes:
- Using the wrong tools (those tiny sponges that came with my compact)
- Applying everything in the wrong order
- Not blending properly
Once I invested in proper brushes, learned the correct application sequence, and practiced blending techniques, my makeup routine underwent a transformation. Now I can create a polished look in 15 minutes that enhances my features instead of masking them.
The key was understanding that makeup application is about technique, not expensive products. You can create stunning looks with drugstore makeup if you know how to apply it correctly.
Frequently Asked Questions (FAQs)
Q1: What is the correct order for applying makeup? A: Start with skincare, then primer, foundation, concealer, powder, blush, eyeshadow, eyeliner, mascara, and finish with lips.
Q2: How does proper makeup application benefit beginners? A: It saves time, prevents skin issues, makes products last longer, and creates more natural-looking results that enhance rather than hide your features.
Q3: What are the common mistakes to avoid when learning makeup application? A: Avoid wrong foundation shades, skipping primer, applying makeup in poor lighting, being too heavy-handed, and forgetting to blend properly.
Q4: How long should makeup application take? A: A basic everyday look should take 10-15 minutes once you master the techniques, while a complete glam look might take 30-45 minutes.
Q5: Do I need expensive products to apply makeup well? A: No, technique matters more than price. Quality brushes and tools make a bigger difference than costly products.
Learning how to apply makeup is a journey, not a destination. The more you practise the more you develop skills which will serve for a lifetime. Remember, the goal isn’t perfection – it’s enhancement. Your makeup should make you feel confident and beautiful, not stressed and frustrated.
Don’t Miss These: Shocking Truths About How Fast Hair Really Grows in 2025